Reset Windows XP, Vista, 7 Password Using USB Drive or CD
A lot of methods are available to recover or reset the Windows password. The famous Ophcrack is used for recovering the password. Even i have posted about using Ophcrack. But the problem is that its bulky in size. We need to download a file of size 500MB to recover the password. So I thought why to recover a lost password, instead why cant we simply reset or delete the password using a 3 MB file open source program. That is what this post is about. I have not found any other method simpler than this one, it resets your password in the blink of an eye.
The method uses an open source program called Offline NT Password & Registry Editor. We can use a USB Disk Drive (Pen Drive) or burn a bootable CD for this method.
Follow the Steps below:
Step 1: Download the cd080802.zip file from the link below and extract it. It contains an ISO file.
Size: 3.15 MB
http://pogostick.net/~pnh/ntpasswd/cd080802.zip (Updated Working Link 13-01-10)
Step 2: Burn the ISO file to a CD. If you are using a USB drive, then mount the cd080802.iso file to a virtual drive. Open the Virtual Drive and Copy all the contents to your USB disk. If any error comes while copying just skip the file. Now to make the USB Drive Bootable open a Command Prompt(Press Start + R, Type cmd and enter) and type the following commands:
Sl. No. | Command: | Action: |
1 | j: | Enter |
2 | syslinux.exe –ma j: | Enter |
Here j is my drive letter, you should enter your own drive letter.
Step 3: Now start the System which you want to reset the password by putting the CD or the USB in the Computer. While start up you have to make sure that it boots up from the correct device i.e. from the CD or the USB. In order to do this go to your BIOS settings and change the boot order as CD or the USB drive as the first option. Or if you know the Boot menu key then press it and Boot from the correctdevice.
Note: Step 4 to Step 8 takes a very less amount of time. No need to worry!
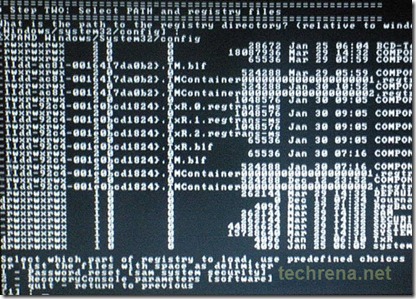
Step 4: After booting from the CD or the USB, press enter to continue the boot process. In the first step it will automatically select the disk where your windows is installed. Simply press enter to continue. In the Second Step it Will select the path and registry files. Select 1 for password reset (It will select 1 by default, just enter).
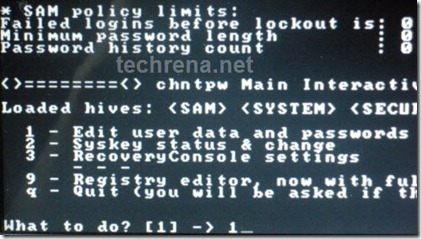
Step 5: Now after selecting the paths, It will ask “What to do?” Simply press enter as it will automatically select 1 for Edit User Password.
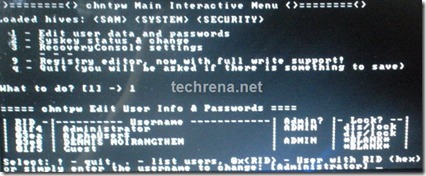
Step 6: It will show a list your system usernames and their password status. Now enter the username whose password you want to reset. It is case sensitive so, be careful and type what you see in the users list. (If the user is Administrator just press enter as it has already selected Administrator by default otherwise enter the correct username)
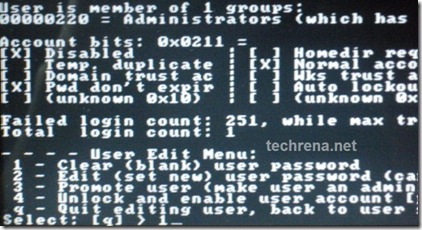
Step 7: It will show you User Edit Menu. Select 1 to clear the user password.
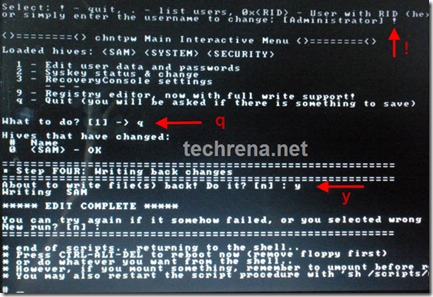
Step 8: It will clear the password. Now Enter “!” to quit from the User select menu. It will again ask “What to do?”. enter “q” to quit. Now in step four it will ask you to write the files or not. Enter “y” to write the files. It will write the files back. Now Simply press enter when it asks for “New run?” as it has selected no by default. The password reset has been successfully completed. Press the power button.
Now start the computer and you will find that it is not asking for password for the user you had selected. That’s it, you are done.
Important:
1. This method will remove your password not recover. If you do not want to reset the password, you can recover it. Visit: http://techrena.blogspot.com/2009/03/windows-password-recoverycrack-windows.html for password recovery.
2. The method has been tested for windows XP, Windows Vista and Windows 7 and all resulted in success.
3. This is for information purposes only. We are not responsible for any damages or illegal acts resulting from this information.
4. The information provided here should be used for legal purposes only.
5. USB Disk method will not work if your motherboard or BIOS does not support USB booting.

